Friday, April 5, 2013

Spring and New Beginnings Part 1: We Wed!

It's hard to believe it's been over a month already, I guess time flies in paradise? Eh... yeah, sure that's it. I think we just jumped right back into the day to day (not to mention an IEP month) hustle and bustle and then BAM... suddenly it's been a month!

Though our blog is about our lives living as parents in an Asperger's world and eating gluten-free, we would be remiss to not share something so momentous as our wedding, especially because it was something that we planned as a family. The kiddos were as much a part of all the silly plans as MacLeod and I were, so we want to share it with you. Believe me, it's something of a fun read... it certainly was something interesting to live through.  We are breaking it into two posts, because, well... the reception was TOO much fun to not tell about it too! Plus, I, Mom worked on a rocking wedding gift for MacLeod and he worked on well...something big too!
 

DISCLAIMER

I apologize in advance if I offend you by making fun of things that you have in fact had in your wedding... these are simply things that we do not like because we are odd people and fancy an unusual type of humor, ya see?
 
 
I always thought it was somewhat silly when people had those darn cocktail napkins that said "Today I Marry My Best Friend" or jam jars that were labeled "Spread the Love".... eh, gag. Oh I think the worst was probably a box of mints labeled "Mint to Be." Wow.
MacLeod and I definitely were out of the box thinkers when we started talking about our wedding plans and honestly it really had little to do with wedding and more to do with a big party. Sure we knew we had to do the ceremony stuff and some of the traditional things like favors, but we had some big ideas that we wanted to have come to fruition. For the most part I think we really pulled it all together even though close to the end we both were pretty sure it was all going to fall apart.
Mom's 6th grade yearbook signature to MacLeod
MacLeod and I first met when we were in middle school and lived in the same neighborhood throughout our childhoods. We were in the same First Communion class at our Catholic Church (now both converted Baptists) and attended the same high school. He met his wife in high school, I met my husband during my service in the United States Marine Corps and that's where things went awry. Everything happens for a reason they say, right? We talk a lot about what things would have been like had we actually started our relationship in high school and not fifteen years later. Would we have been the same people? Of course not. Who knows what it would have been or not been. But at the end of the day we both know that we definitely are supposed to and were always meant to be together. It just took a little longer for us to find each other... the scenic route, if you will.
The things that made us realize that it was always one another were the things we talked about in our all night conversations and even things we still discover about each other. My first car a classic 1969 Ford Fairlane 500, he owned a 1953 Ford F100. We loved the same music and ridiculous humor and best of all got each other's terrible references to obscure movies and shows.
We were dating for about six months when we started to plan our wedding. It took us (MacLeod!) a year to get engaged (ahem) and then the actually wedding planning began. The first thing that we knew that we wanted to have was a photo booth and we knew that we wanted our photo booth to be none other than the TARDIS of the famed Doctor Who. We felt this was extremely befitting because 1. we love Doctor Who, not just MacLeod and I, but the kiddos too (see Power of Three Crepes) 2. It is the 50th Anniversary of Doctor Who. How can that not be a good omen, am I right? Our marriage is bound to last the test of time (And Relative Dimensions in Space....eh?) For a while we just reveled in how awesome that would be.
One day we went to a bbq festival and came across a distillery in our area, they directed us to tours they were just starting. A few days later we toured the facility and met the kindest master distiller known to man, Truman Cox. He said "someday" they were planning on having weddings in the distillery and quoted us a price. I don't think he planned on entertaining us so soon, but that is when everything came together.
Everything came together, yes...well, it was chaos, and insanity. But that was the start. We had out venue for sure. Two months later, we called the distillery back and talked to Truman and he agreed to rent the space to us, ever so skeptically given the crazy theme of our wedding. See my friends we decided that our wedding was indeed a theme wedding after all. Because MacLeod and I had been through hell and back with our previous marriages, custody issues and continued problems. Before we did the fancy party, the standard walk down the aisle, the cute little "mint for each other" crap. So our theme was "It's All Been Done Before", and we would walk down the aisle to THAT track by The Barenaked Ladies.
But that is jumping ahead a bit. Let me back up.
So the theme was "It's All Been Done Before." Our guests had lots of warning that this was not a "normal" wedding. We sent out the Save the Date which told them first what to expect a bit and directed them to our Facebook page for additional details if they were Facebook savy. Then the invitation came. The invitation included the actual invitation which on its own was the invite to the event and reception. Then there was a second explanation of our unusual wedding plan which went like this;


Dear friends and loved ones,
 

As you also probably know, both of us have been through this all before so we decided that we were not going to ever do it all the same again. In doing so, our invitation to be a guest at our wedding requires a little explanation.
Our ceremony will be something of a game, when you arrive you will receive a sheet and a pencil with spaces to fill in your answers. During the ceremony there will be some obvious, some not so obvious reference to movies that we love. You may see a guest or member of the wedding party dressed like a person from a movie or you may hear lines spoken
directly from some amazing flicks. You have to keep your eyes peeled and ears perked as you try to find all the answers to fill your sheet. To help you do this we are including a list of movies you should really consider familiarizing yourself with before the wedding- and don’t be a schmuck, join in!

When you arrive to the reception, your sheets will be collected from your tables and scored up and winners will be chosen! Yes, there will be a 1st, 2nd and 3rd prize basket for our insane wedding game.
Is this a strange way to have a wedding? Yes! Will all of you agree with it or participate? Of course not! But “it’s all been done before…” so we are making this exactly the way we want it to be and we hope that you can have as much fun as we will.

  Then it included the movie list that they were to "study" to be familiar with for the insane wedding game. It definitely was an unconventional way to have a wedding, but we wanted to have a good time, and we did the stuffy church bells already.

So the idea was that our wedding ceremony was to be completely scripted sort of like a movie, MacLeod, myself, our pastor and some members of the audience or wedding guests had parts to play in this script to make the wedding work. The guests however did not actually know their parts until they arrived because otherwise they would not have been able to participate in the game. We wanted everyone to be able to play the game if they could. So the only people that could not play the game were those who attended the rehearsal.

I created the script, and our pastor was amazing and great to work with. He was hilarious and we talked a lot before the wedding and a lot of it was pretty fluid and easy to sort of ad lib. There were some parts that we talked about before that we wanted to include after the shenanigans. Of course, we wanted to have our ceremony in our church because we wanted to honor our faith and our God, therefore we wanted our pastor to talk about our Holy union and the seriousness about it as well.

The ceremony begun with the guests seating. While the parents were seating a video to the theme music of Star Wars played with a tale of woe of Princess Mom and MacLeod Skywalker and their battles to escape their evil captors to find one another and ultimately eternal happiness. It played in a Star Wars crawl... this set the nerd theme of the entire wedding.

When the Star Wars crawl played out the Barenaked Ladies "It's All Been Done Before" started up, the bridal party started their way to the altar. The final pair in Monty Python style, one with coconuts, ala Patsy and the other galloping "on horseback." Finally the little ladies with the flowers headed down and then it was time for me and the kiddo, timing was everything so we had to wait for the music to do it and then ...."As you run down the aisle... wooo hooo hooo!!!" And we ran down the aisle, me and my little man, and he gave me away, my dad took my hand and then the ceremony proceeded into the script.

The first prize part, which was my dad's part that he proudly took was from The Godfather, MacLeod had to bend down and kiss his big ringed finger, it was hilarious. Then my father handed me over to MacLeod and took his seat.

This is already a marathon of a blog post so I won't write the entire ceremony out, but it was a great deal of fun, even the few parts we forgot from the original script, weren't missed. I think all said and done my favorite part, aside of the best ever last line of a wedding ever and yes, I have to actually write for you my dear friends:

Pastor:  "Well.... I'm not great at farewells, so, uh, that'll do, pig" (Zombieland)
 
 Mom:"That's the worst goodbye [we've] ever heard and you stole it from a movie." (Zombieland)

MacLeod Kisses Mom

Mom and MacLeod Exit to: Nine Inch Nails, We're In This Together

Monday, March 4, 2013

Gluten-Free, Casein-free Girl Scout Cookies: Samoas!!!


So it's taken me a little bit to get this last cookie to you. Best for last? Yes.

I also had a wedding to finish planning and... well get married and all. More to come on that I promise! Then it will be back to business as usually, and I hope well much more than that. I have so much exciting things that will be popping up this year! But for right now, let me get back to the business of the Girl Scout Cookie, because we are still, in our house, in GSC high gear.
 

Since I already had my base cookie (remember the cookie used for the Tagalong here?) for the Samoa I didn't even need to think about that. But the topping, that was something to think about and I had been. A casein-free caramel-like topping. Back in my professional baking days I had a German chocolate cupcake that I used to topped with a vegan coconut pecan cream topping. So I got to thinking about it and thought that minus the pecans if I did it just right that it might work out nicely for the Samoas. So I got to experimenting with the sauce that I had used which is a base of brown sugar and coconut milk. Rather than boil it together I decided to cook the sugar first like you would cook caramel and that was the secret ticket because viola'! I made caramel sauce completely casein-free and it was absolutely amazing. MacLeod got home and I sampled some to him and he asked me where in the world I got casein-free caramel sauce because he knew I had been looking for some (I had this ice cream thing several weeks back and no safe toppings which made me angry) and I told him that I made it he was shocked!

(Since I have made this caramel sauce, I have been using it an SO many things... it's my new favorite thing!)

So then there is the final result of course which of course the kiddos need to try, the real critics. Well, they take the cookies in their lunch boxes to school and wave them in their classmates faces very obnoxiously and say "my moooom made these for me!" (I actually saw it one day, had I not had warm fuzzies about it I would have scolded them about it) So I think I have gotten the gold seal of approval from them. Additionally, I have shared them with others who are certified Girl Scout Cookie eaters and they say "omg, these are amazing," at least that is what it sounds like through the mouthful of cookies.


Gluten-Free, Casein-free Samoas


Shortbread Cookie:


1/2 C Spectrum Shortening

1 1/4 C Gluten-free Flour Blend

1/3 C sugar

1 tsp vanilla

1 egg

1/2 tsp baking powder

1/8 tsp salt

Coconut Caramel Topping:

2 C Organic Raw Coconut
1 C Brown Sugar
3/4 C Coconut Milk
1/4 C rice milk
1 Tbs tapioca flour
2 tsp vanilla extract

Chocolate Glaze:


10 Oz. Gluten-free, Casein-free chocolate

2 Tbs vegetable oil


1. Preheat oven to 350 degrees.

2. Blend together flour, baking powder and salt in a medium sized bowl.

3. In a stand mixer add shortening and sugar and blend on medium-high until creamy. Add extract and egg. 

4. 1/2 C at a time, add flour mixture to mixer and blend after addition until all the flour has been added. The dough will begin to lump together which is what you want to happen.

5. Turn the dough back into the medium sized bowl and press it together and work it with your hands a bit just to get a uniform ball.

6. Place the ball of dough in the bowl and refrigerate for at least 2 hours, even over night is fine.

7. Cut two pieces of parchment paper, place one on your work space. Cut the dough in half (its easiest to work with a portion of the dough at one time)and flatten the dough just slightly and press the second piece of parchment on top of it.

8. With a rolling pin, roll out the dough to 1/4" thick. I actually put a ruler to it to measure this because I wanted to get a really nice thickness for the shortbread. A thin shortbread is too crisp. Try your hardest to keep a uniform thickness in the dough.
 

9. With a cutter (1.5" round) cut round circles (OR if you have a cutter with the center cut out )then cut out small circles out of the center of the circles (I used a pastry tip, the bottom opening)and place on parchment paper on a baking sheet.

10. With a rolling pin, roll out the dough to 1/4" thick. I actually put a ruler to it to measure this because I wanted to get a really nice thickness for the shortbread. A thin shortbread is too crisp. Try your hardest to keep a uniform thickness in the dough.

11. Bake for 10-12 mins. at 350 degrees.

12. Allow cookies to cool. Once they are cool from the oven, place the cookies into the freezer.

13. While the cookies are cooling start the sauce. In a small bowl combine the Coconut milk, rice milk and tapioca flour.

14. in a small sauce pan over med-high heat add brown sugar. Heat the brown sugar until it actually melts and starts to bubble. It's a tricky place because you don't want to burn it, but want to slightly caramelize it. So let it just start to boil.

15. Once the bubbling starts, add the milk and tapioca mixture and reduce the heat immediately to a simmer. Continue to stir vigorously until the temperature comes down and the boiling stops.

16. Heat a skillet to medium-high heat. Add the coconut and sauté it until you just start to smell the coconut and see it slightly browned. Remove it quickly so it doesn't burn.  
 

17. Add vanilla and the coconut to the sauce and let it sit to cool.

18. Once the coconut topping has completely cooled removed frozen samoa bases from the freezer about 4 at a time.

19. Fill your icing bag, fit with a Ateco #806 tip or something comparable (in a pinch a Ziploc Freezer bag with a corner cut off can work) with the coconut filling.

20. Pipe the filling around the edge of the cookie one at a time. After each filling has been added, replace the cookie to the freezer to set.

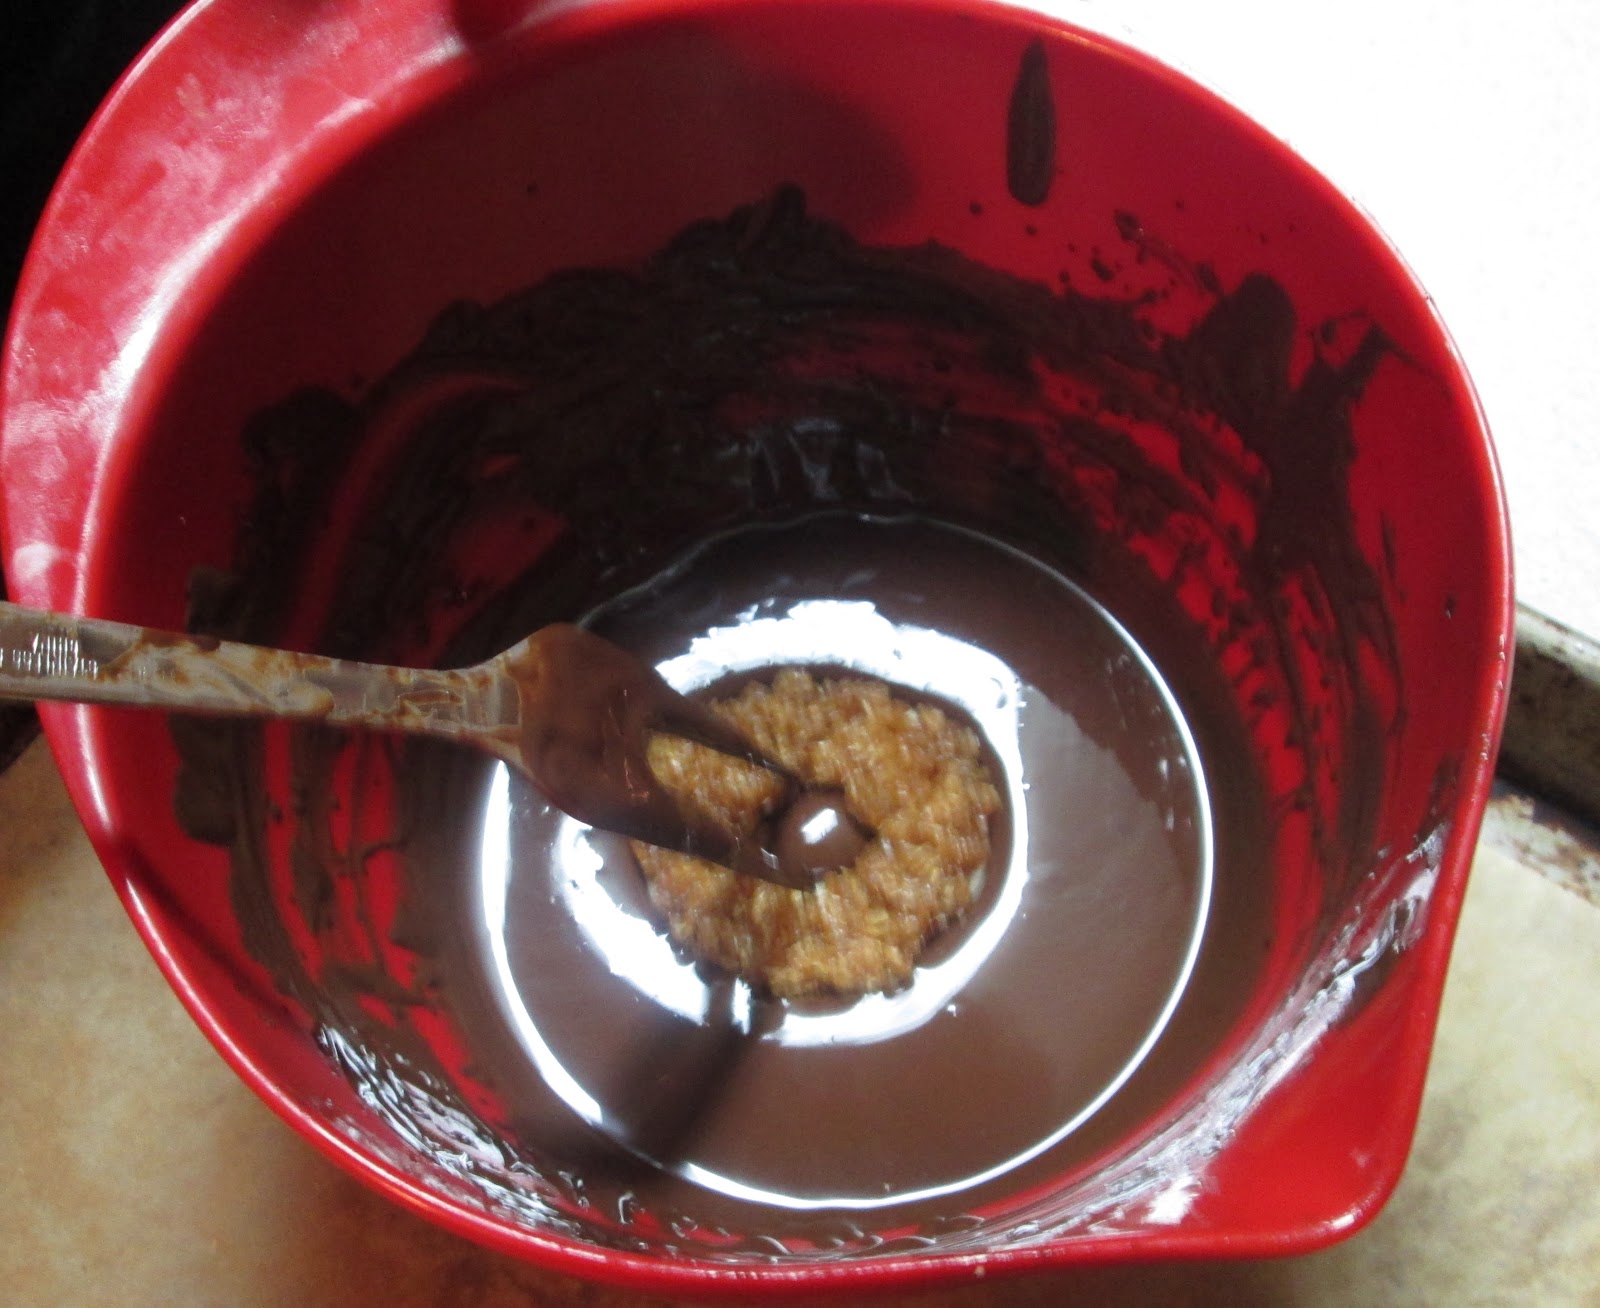
21. In a bowl, melt your coating chocolate at 30 second intervals being careful not to burn the chocolate. Add the oil to make the mixture viscous.

22. Once all the cookies are frozen (this is really important or your topping is going to just fall into your glazing chocolate) pull out about four cookies at a time.

23. With a dipping device (they sell these do-dads in culinary stores... I just use a carving fork, as you can see) dip the cookie into the coating chocolate by simply placing it on top of the chocolate and lifting it out and letting it drip.

24. Place it on a parchment lined baking sheet. Repeat with all the cookies until they are all done.

25. With a smaller icing bag, or again, Ziploc bag with the corner cut, drizzle some of the remaining chocolate across the cookies.

26. Place the cookies in the refrigerator to set for about an hour.

27. Enjoy!

Thursday, February 7, 2013

Gluten-free and Casein-free Girl Scout Cookies: Tagalongs!

Holy Virginian Peanuts Batman!


Ok... maybe that sounded better in my head than it actually looks on paper, but man do I love myself some peanuts and wouldn't ya know if Virginia, my home state, is known for peanuts. MacLeod on the other hand, though he loves peanuts like no other is always wary because his nephew has a deathly peanut allergy. So we tend to keep peanuts close to the cuff, not something we actually keep in the pantry all too often. But when you talk Girl Scout Cookies, you got to talk about Tagalongs.


I knew going into it that with this cookie the challenge was going to be the "shortbread" or "butter" cookie part of it. Additionally I knew that it was going to be the base for my final cookie as well, the Samoa, so I had to get it right. My friends, there are literally hundreds of recipes for these "shortbread" cookies on the interwebs out there and I tried TWELVE of them. I kid you not, I tried TWELVE. What was that you ask? Did the first few turn out like rocks? Indeed they did. Were some of them not even edible? Nope they certainly were not. Oh yes, indeed the gluten-free flours are expensive all get out! UGH! But I was on a mission I needed to get these darn cookies right. To my surprise I did manage to come up with one batch of cookies that I have slotted into my cookie recipe bank as "Danish 'butter' Cookies"... you know those ones that come in those blue tins with the coarse sugar on them?? OH so GOOD! Yes, I made some that taste just like that, but not shortbread.

Anyway, thirteenth time's a charm and I  finally got my crumbly delicious shortbread cookie that I wanted. And they were ah-mazing, biting into them you would never be able to tell that these cookies were absent of any butter, its craziness! From there it was all about chilling, cutting and assembly.


Shortbread Cookie:


1/2 C Spectrum Shortening

1 1/4 C Gluten-free Flour Blend

1/3 C sugar

1 tsp vanilla

1 egg

1/2 tsp baking powder

1/8 tsp salt


Peanut Butter Filling:


2 C Natural Creamy Peanut Butter

3/4 C confectioners sugar (this is to thicken and sweeten, if you want to forgo the sweetener all together)


Glaze:


10 oz. Casein-free Chocolate chips

2 Tbs vegetable oil

 
1. Preheat oven to 350 degrees.

2. Blend together flour, baking powder and salt in a medium sized bowl.

3. In a stand mixer add shortening and sugar and blend on medium-high until creamy. Add extract and egg. 

4. 1/2 C at a time, add flour mixture to mixer and blend after addition until all the flour has been added. The dough will begin to lump together which is what you want to happen.

5. Turn the dough back into the medium sized bowl and press it together and work it with your hands a bit just to get a uniform ball. It may be a little sticky, that is fine when it is chilled it will come together.

6. Place the ball of dough in the bowl and refrigerate for at least 2 hours, even over night is fine.

7. Cut two pieces of parchment paper, place one on your work space. Cut the dough in quarters(its easiest to work with a portion of the dough at one time)and flatten the dough just slightly and press the second piece of parchment on top of it.

8. With a rolling pin, roll out the dough to 1/4" thick. I actually put a ruler to it to measure this because I wanted to get a really nice thickness for the shortbread. A thin shortbread is too crisp. Try your hardest to keep a uniform thickness in the dough.

9. With a cutter (1.5" round) cut round circles and place on a parchment lined cookie sheet.

10. Bake for 10-12 mins. at 350 degrees. As soon as you pull the cookies out of the oven with a spoon or ladle (as I used) push a small indentation into the cookie to create a little more of a space for your peanut butter filling.

 
11. While the cookies are cooling, combine the peanut butter and sugar and blend vigorously, you can do it in a stand mixer, but by fork does just fine, just be sure to blend it well enough to get all the lumps out and get a smooth consistency. When you first add the sugar it will lump together but as you continue to break it back up and mix it will thin back out and become smooth again.

12. Fill a piping bag fitted with a large round tip (a Ateco 802 or similar) OR you can use a freezer bag with the corner cut off with an ok result as well. (the piping bag is just a little neater and cleaner, but improvisation works and makes for a budget friendly kitchen!) With bag filled, hold bag upright over cookies, and squeeze enough peanut butter to spread to the edge of the cookie. With on offset spatula or knife, spread the peanut butter to the edge of the cookie.  If you don't like how the shape of the peanut butter looks (because that is what the shape is going to look like after they are chocolate coated) you can reshape a little after they are refrigerated).

13. Repeat with each cookie and place completed sheet of peanut buttered cookies in freezer (the freezer, kids, is a must. When these peanut butter cookies get dipped in the hot chocolate they NEED to be cold, do not skip this step) for at least 30 minutes.

14. Towards the end of the chilling, melt your coating chocolate at 30 second intervals being careful not to burn the chocolate.

15. If you want to reshape any peanut butter mounts, do so now or forever hold your peace. I am a perfectionist and can't help but reshape them.


 Before the                  After the Chilling                      Chilling
                              
                       (and
                                              reshaping!)     
  
 
16. When the cookies have chilled, using a fork place the cookies in the chocolate and immerse them in the chocolate then with the top of the cookie facing up, scoop the fork under the cookie and gently tap the cookie's side at the edge of the bowl to let any extra chocolate drip off.

17. Place cookies onto a parchment lines cookie sheet to set. Once all the cookies are on the sheet, refrigerate to help set the chocolate.

18. (Again.. unnecessary step, but I do it for looks)If you want the looks to look nice, you can simply take a paring  knife to the edge to cut off any excess chocolate that puddle when you placed them after the chocolate dredge. But it's up to you, the taste great just the same!

19. Add a moderate amount of milk... or in my case a dairy-free substitute and enjoy!


Monday, February 4, 2013

Gluten-Free and Casein-Free Girl Scout Cookies! : Thin Mints


In the far reaches of my mind I remember a very short period of time when I was a Brownie. Yes folks... I was a Brownie. I know, you think... why is that I shocker? Well my friends, your snarky host here these days is so incredibly anti-.... umm, well, everything. (slight overstatement... but let's just say I am not the model Girl Scout mom or PTA Volunteer of the month) I don't think that there was ever a time though however that I ever had the opportunity to manipulate adults in such a way that only a Girl Scouts can each year with mass amounts of cookies. I think my Brownie days lasted maybe 6 months at the most when our troop leader lost a girl or two at the camp out that my mom didn't allow me to attend and my career in the scouts came to an abrupt end. I moved on to sports. My kiddos however both love the scouts, so here we are.

So then we get to cookie sales. Well to backtrack a little, a few months ago kiddo had popcorn sales with the Boy Scouts. It was a HUGE deal for him because for him to go and do cold sales... well do I need to explain? HE HAS ASPERGERS! So we wrote up a script. We practiced said script. We worked on eye contact. We worked on body language. We worked on knocking on doors. We worked and worked and worked. Then we went out and started to do sales. He did so well and was so pleased with himself. I think I cried every time he got a sale, it was a little pathetic and the people buying the popcorn thought I was insane. I took pictures.... and they thought I was insane. It was such a huge moment for him and though we did have some times where he needed help, for the most part he did such an amazing job.

So the popcorn wasn't a gluten issue, we bought popcorn and ate it. But I knew when the time came for Lil sis to sell cookies we would be in trouble because Kiddo was going to ape about it. I made Lil Sis promise that she could eat Girl Scout cookies, but NOT at home. Then I had an idea, why not make some of my own and just have them ready to go so when those cookies were, as he says "taunting" him, I could pull out our own gluten and casein-free versions and say "POW, here you go!"

Before I embark on making any new thing in the kitchen, cake, cookie or whatever it may be- I start with some research online. I look to see what everyone else has done because honestly there is no sense in reinventing the wheel. So starting off by knowing what ratios of gluten-free flours to the eggs and fats have worked best for other bakers is a good way to start and its usually how I start. That being said, there just aren't that many bakers out there that are baking both gluten AND casein-free. So it's a little more challenging to find copycat recipes like Girl Scout cookies that are GFCF which is why I worked so incredibly hard at trying to perfect these.

Because the components of these cookies are rather intricate and the steps pretty long, I am not including them all on one post, which I had originally intended to. Rather, I am breaking them up into three posts, the first being Thin Mints, Second Tagalongs and the last Samoas. Thin Mints are pretty straight forward, but the Tagalongs and Samoas are going to be chock full of descriptions and lots and lots of pictures for your viewing pleasures. Again, I was writing up these recipes and while I had the intent of just posting the recipes and shooting them out to you, I realized that it wouldn't serve you to well if you couldn't actually technically make them. So I decided to make them AGAIN and take lots of pictures to be able to offer you a visual, something that I know would help me. I have been teasing my Facebook friends for weeks now with pictures of these cookies, and my greatest apologies that the recopies have been less than quick to release, but I assure you that I only want to offer you my best!

So without further adieu... Thin Mints....

Thin Mints were the first and by far the easiest, the fats took very easily and the dough was very easy to manipulate and change to substitute out butter for palm oil instead. I didn't use coconut oil, which is usually my first choice in baking because during the holidays I did get a number of people ask if I had coconut in my cookies, which is fine, but I don't want to have a coconutty flavor in the thin mint. I attempted the dough twice for the Thin Mint and felt pretty happy with it. I did adapt my recipe from Nicole Hunn at Gluten Free on a Shoe String, a great blogger and author in the gluten-free world.


Thin Mints


1/2 sugar

1/2 C casein-free semi-sweet chocolate chips (We use Enjoy Life)

1/2 tsp peppermint extract


1/2 C cocoa powder

1/4 tsp baking powder

1/2 tsp salt


Glaze:

10 oz. Casein-free Semi-sweet chocolate

3 Tbs. palm oil

1 tsp Peppermint Extract


1. Preheat oven to 300 degrees.

2. Blend together flour, cocoa powder and baking powder in a medium sized bowl.

3. In a stand mixer add shortening and sugar and blend on medium-high until creamy. Add extract.

4. 1/2 C at a time, add flour mixture to mixer and blend after addition until all the flour has been added. The dough will begin to lump together which is what you want to happen.

5. Turn the dough back into the medium sized bowl and press it together and work it with your hands a bit just to get a uniform ball.

6. Place the ball of dough in the bowl and refrigerate for at least 2 hours, even over night is fine.

7. Cut two pieces of parchment paper, place one on your work space. Cut the dough in half (its easiest to work with a portion of the dough at one time)and flatten the dough just slightly and press the second piece of parchment on top of it.

8. With a rolling pin, roll out the dough to between 1/8 and 1/4 inch thickness. No thicker though or you won't have the crispness you want for the "thin" part of the Thin Mints. Try your hardest to keep a uniform thickness in the dough.

9. With a cutter (1.5" round) cut round circles and place on a parchment lined cookie sheet.

10. Bake for 10-12 mins. at 300 degrees.

11. While cookies are cooling, melt chocolate in a bowl. When using the microwave just be sure to only melt at 30 second intervals and then blend. If you go longer the chocolate will burn. Start with 30 second, mix until the heat has come down and if there are still bits unmelted, heat another 30 seconds and blend again until the heat has come down again. Add the oil and extract to this the mixture to be able to dip the cookies.

12. When the cookies have chilled, using a fork place the cookies in the chocolate and immerse them in the chocolate then with the top of the cookie facing up, scoop the fork under the cookie and gently tap the cookie's side at the edge of the bowl to let any extra chocolate drip off.

13. Place cookies onto a parchment lines cookie sheet to set. Once all the cookies are on the sheet, refrigerate to help set the chocolate.

14. (a unnecessary step, but I do it for looks)If you want the looks to look nice, you can simply take a paring  knife to the edge to cut off any excess chocolate that puddle when you placed them after the chocolate dredge. But it's up to you, the taste great just the same!